
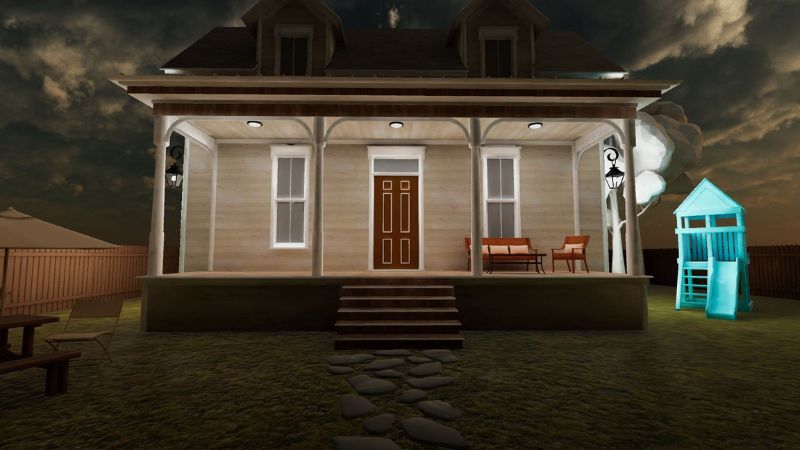

Baked lights in Unity offer better performance than realtime lights because all the lighting computations happen before the game runs.
They add realism to your game by simulating bounced light and how it lights up different areas in the scene.
Coupled with reflection probes and light probes, you can achieve realistic lighting at a fraction of the cost.
This guide walks you through all the things you need to do before baking lights in the Unity Game Engine and provides additional useful information to achieve your desired lighting setup.
If you’re reading this article on a smaller device, right-click on the images (long-press on touch devices) and select Open image in new tab to view them at full size.
If you’re a visual learner, you can watch the video version below.
Table of Contents
Set Up Process
The first step in preparing your models for light baking is to ensure they can generate lightmap UVs.
Remember that baked lights work best with static objects in your scene, such as the walls in a house, immovable furniture, or props the player can see but can’t interact with.
If you imported the 3D model from the Unity Asset Store, it will likely be inside a folder named Models, Meshes, FBX, or something similar. If you dragged it into Unity from your computer, it’ll show up as is.
Remember that 3D models end in .fbx, so don’t confuse them with other similar-looking files, such as prefabs that end in .prefab or materials, which end with .mat.
Once the 3D model has been imported using Unity’s Package Manager window or dragged and dropped into the Project window from your computer, click it and observe the Inspector window.
Tip: If you can’t find a window, click on the Window option in the navbar at the top of the screen and check the dropdowns.
Click the Model tab in the Inspector window and check the box next to Generate Lightmap UVs. Click Apply to apply the settings.
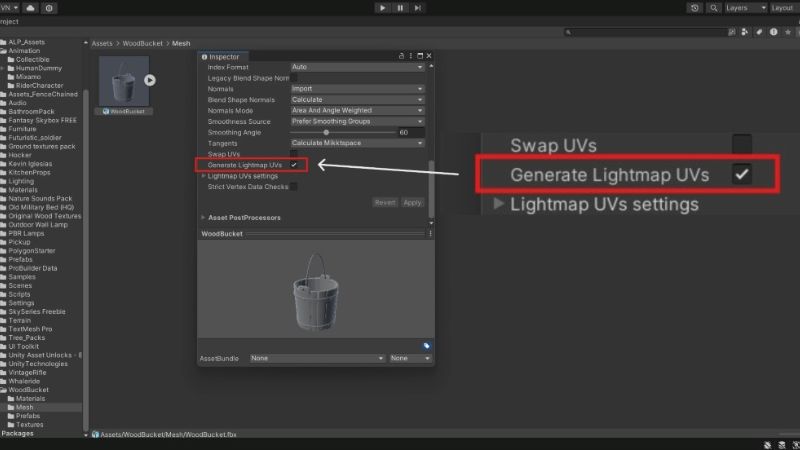
Checking this box ensures the 3D model will generate lightmap data when baking lights. Repeat this for the other static objects in the level you’re building.
Next, drag the 3D model into the Scene window, turning it into a GameObject.
Once the model is in the scene, the Inspector window will display new information related to GameObjects. Check the box at the top right beside Static to let Unity know the model won’t move at any point in the level.
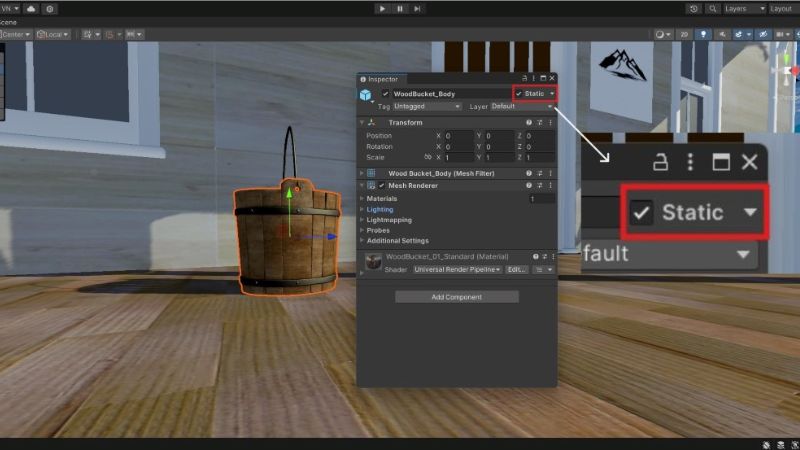
If you modeled the GameObject using ProBuilder, it will likely have a ProBuilder MeshFilter component with a Lightmap Static checkbox that’ll be automatically checked when you check the Static checkbox.
The GameObject should have a Mesh Renderer component in the Inspector. Click it to unfold the dropdown, revealing other dropdowns.
Tip: If you don’t see this component, it might be on one of the GameObject’s children. You can check for children in the Hierarchy window.
The one you’re most interested in is the Lighting dropdown. Click it to reveal the lighting options.
Check the box next to Contribute Global Illumination so the GameObject influences lightmaps and light probes when baking lights.
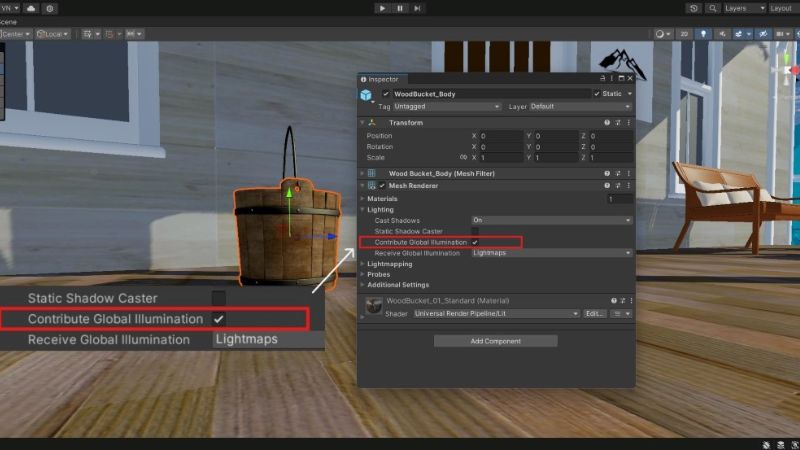
Tip: Checking Contribute Global Illumination without marking the GameObject as Static will automatically check the Static box.
Enabling global illumination will reveal another dropdown named Lightmapping. These settings inside it can be left as is, unless you want even finer control over the lightmapping process.
Leave the Receive Global Illumination dropdown at Lightmaps since the GameObject will be illuminated by the lighting data from the lightmap.
If you don’t want the GameObject to cast shadows or only want shadows from a particular direction, you can change the Cast Shadows option.
Repeat these steps with any new GameObjects you add to the scene as you’re designing your level.
Types of Light in Unity
There are different light types in the Unity Game Engine, so the one you choose will depend on how you want the light to affect the scene.
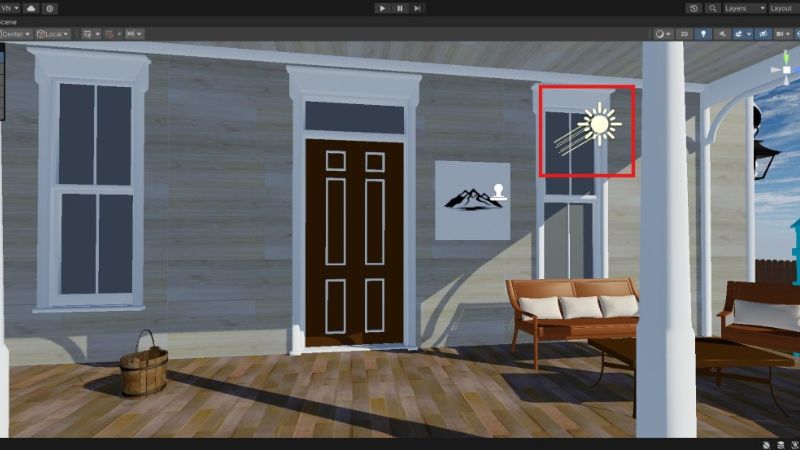
Directional Light
Directional lights are good for light coming from a source very far away, such as the sun or the moon. They don’t have a physical location in the scene, so you can place them anywhere, and the lighting will be the same. One is often enough per level.
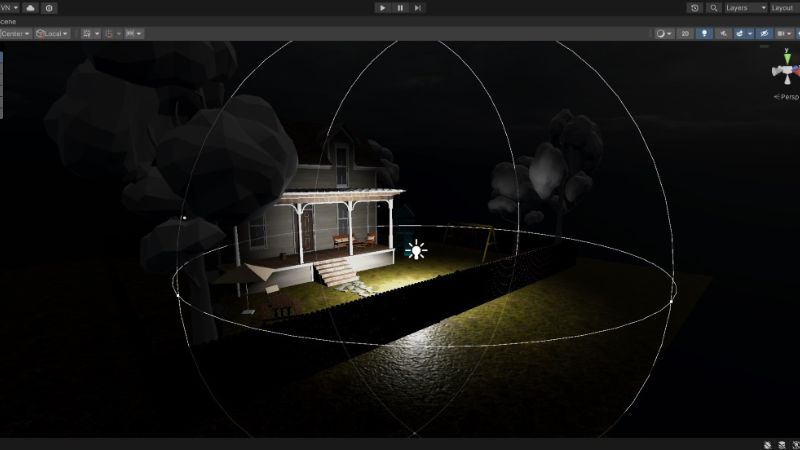
Point Light
Point lights are good for lights that light up an area in a radius, such as light from candles, a lantern, or a fire.
Interested in making games in Unity? Become a patron on Patreon and gain access to cheat sheets, behind-the-scenes content, advanced scripting videos, and more.
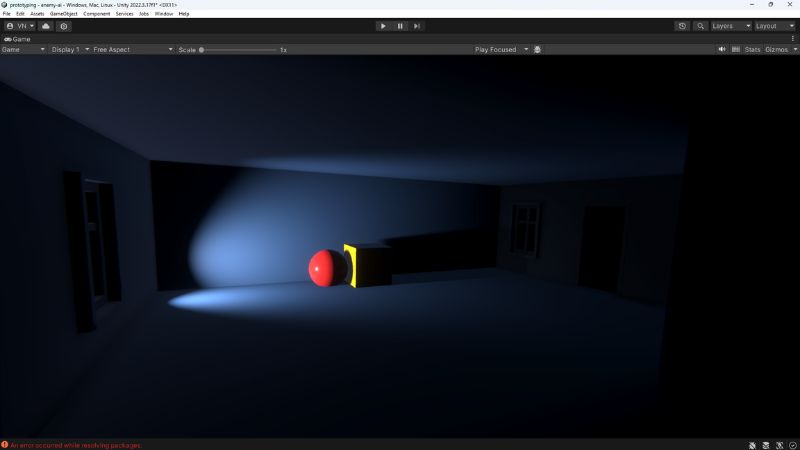
Spot Light
Spot lights work well with lights projected in one direction in a cone shape, such as you’d see from flashlights or search lights.
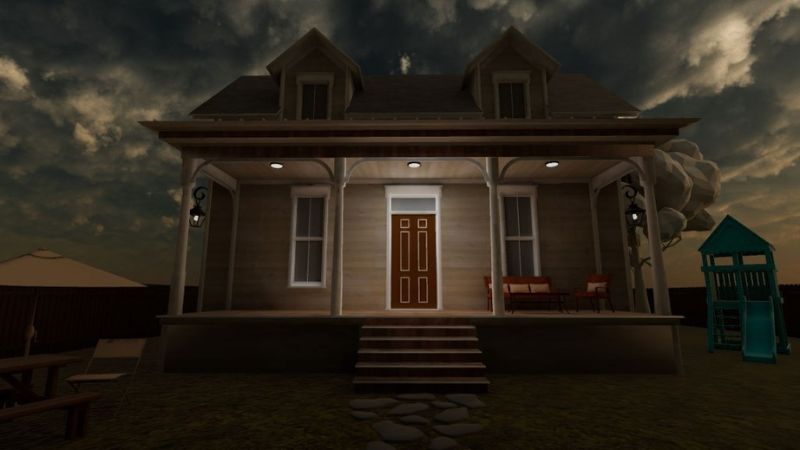
Area Light
Area lights emit light uniformly from a circular or rectangular area. These are great for indoor lights and other smaller sources of light.
| Directional Light | Point Light | Spot Light | Area Light |
|---|---|---|---|
| Lights up entire scene. | Circular radius light. | Cone shaped light. | Circular or rectangular light emission. |
| 1 per scene often enough. | Can have multiple. | Can have multiple. | Can have multiple. |
| Sun or moon. | Candles, lanterns, etc. | Flashlights, streetlights, etc. | Gentle lights e.g. bulbs. |
| Modest performance. | Many hurt performance. | Better performance than point. | Most costly. |
| Realtime or baked. | Realtime or baked. | Realtime or baked. | Baked only. |
Adding Lights in Unity
Once the level looks the way you envisioned, it’s time to add some lights.
Click the “+” in the Hierarchy window > Light > Select the light you want to add.
You can change the lighting mode from Realtime, Mixed, or Baked based on which looks good to you.
Realtime and mixed lights have crisper, dynamic shadows but have a bigger impact on performance.
Baked lights are the best for performance but don’t update the lighting when they’re moved and don’t cast dynamic shadows for moving objects.
Tip: You can bake lights in Unity for all three light types to improve your game’s appearance. You don’t have to use realtime lights only.
You can control each light’s intensity, color, range, and shadows cast by changing the options in the Light component in the Inspector window.
Once you’ve added all the lights and the scene looks good to you, it’s time to bake them.
Baking Lights in Unity
First, open the Lighting window if it’s not open: Window > Rendering > Lighting.
Under the Lighting Settings in the Scene tab, you’ll need to create a new Lighting Settings Asset. This is a file that stores the level’s lighting settings and ends with .lighting.
You don’t have to adjust any values initially after creating the asset, but it’s required to change the lighting settings.
Ensure the Baked Global Illumination box is checked, and select Shadowmask or Baked Indirect for the Lighting Mode option. You can tinker with these later to see which works better for your game.
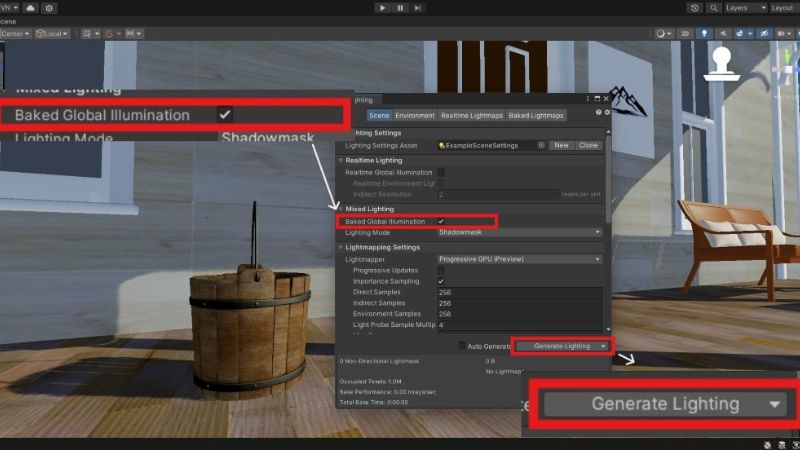
Click the button at the bottom of the window labeled Generate Lighting to bake lights and wait until the countdown timer at the bottom right of the screen reaches 0.
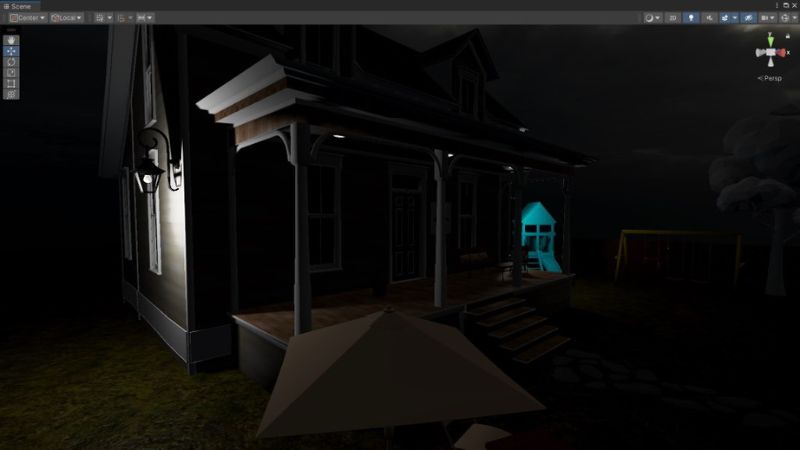
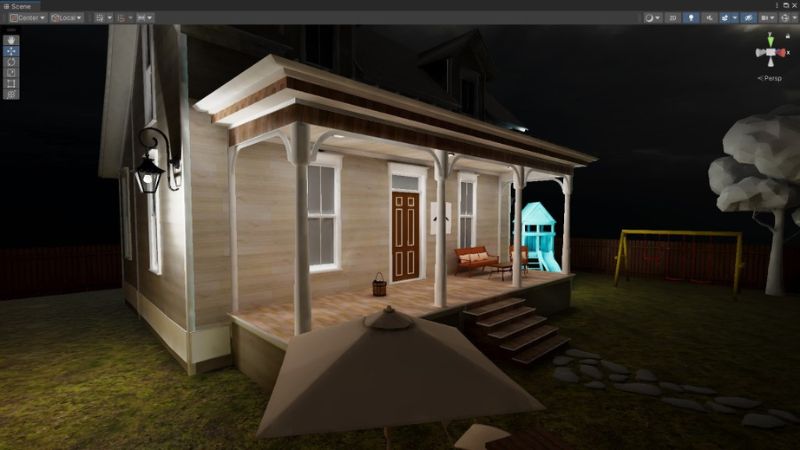
If you followed the steps correctly, the objects in your level should have more realistic lighting. If not, read the Unity Lights Troubleshooting Guide to help triage the problem.
Baking lights in Unity can take a long time, so you can turn down some of the lighting settings to speed it up.
Here’s a breakdown of some of the settings and how they affect light baking:
-
Lightmapper: Determines which piece of hardware you’ll use to bake lightmaps, either the CPU or GPU. Try switching between them if one takes too long to bake lights.
-
Direct Samples: Samples used for direct light calculations. Higher values improve the lightmap quality but increase bake times. Changes in predefined steps, between 1 and 256.
-
Indirect Samples: Samples used for indirect light (bounced light). Higher values improve the lightmap quality but increase bake times. Changes in predefined steps, between 1 and 256.
-
Max Bounces: Maximum number of light bounces used in calculating indirect lighting. Higher values improve indirect lighting but may increase bake times.
-
Lightmap Resolution: Controls the lightmap’s resolution. Higher values improve the lightmap’s resolution but increase bake times.
Tip: You can hover over each setting, and a tooltip will appear explaining what it does.
In Closing
You now know how to bake lights in the Unity Game Engine, and what’s left is to tweak the settings until you achieve the desired lighting in your level.
You can go a step further and adjust the final appearance of your game using post-processing to achieve things like glowing objects or effects like film grain for games set in older times.